Since we started blogging, my decor style seems to be changing. My rule of thumb used to be "nice and simple, but not too girly," because living with two guys doesn't leave a lot of room for lavender and lace. But lately I've been breaking my rule more and more.Blogging has set me free from my earlier notions of style and has let me go with the wind in each project. This time the winds were blowing from the land of Faerie, as I wanted to turn this rocking horse into a whimsical white horse.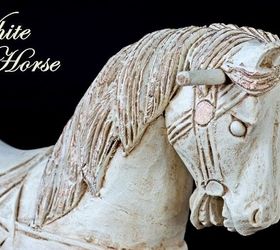 Although the horse was in good shape for a $25 craigslist find, it still had its imperfections in the carved areas and on legs. I am not sure why I didn't start the project with sanding down those imperfections, but I am glad I didn't, and I am sure you'll agree with me when you see the finished project.
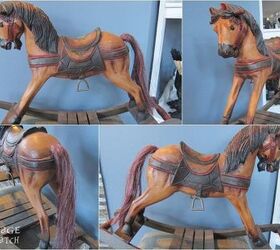 First, I cut the tail off. It wasn't in very good shape - the color was faded and it felt like bristles when touched.
Next, I gave it a quick cleaning to get rid of the dust and lint before painting. Then I gave it two coats of paint with my homemade chalk paint. The recipe for my homemade chalk paint can be found here.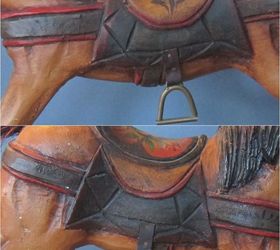 The moment I finished painting, I started doubting if my color choice was right because of the eyes. They looked a little angry up-close. Knowing that it was nothing close to what I had in mind, I decided to antique it, as I knew that could soften up the sharp white look.
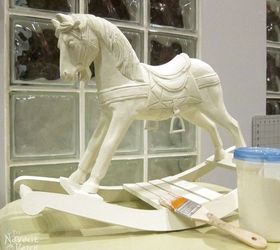 As I work with antiquing wax more and more, I have learned that an imperfect surface also adds beautifully into that equation. This is why I was happy that I never started this project by sanding down those imperfections.
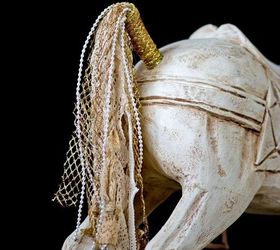
Here is how the horse looked after antiquing. Much better than the simple white version! But I still had a little more work on it.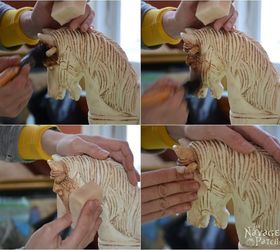 Now it was time to fashion a tail. I had to get creative since I didn't have anything on hand that would look like golden hair. I gathered some ribbons and lace and crochet remnants which Mom gave me for crafting, as they were not usable otherwise.
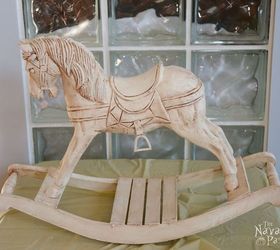 I started ripping off the lace from old napkins and cut strips from the other lace and the crochet remnants. I separated the pearl strips from the white ribbon seen pictured above. I also cut strips of the golden mesh ribbon which I found in my Christmas ribbons stash.
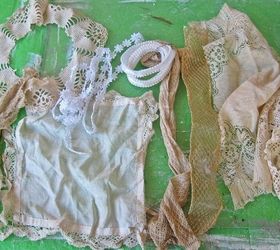 One by one, I started hot gluing them on a small piece of dowel.
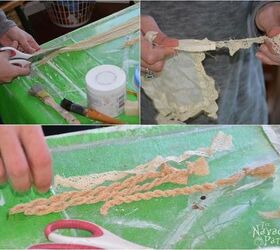 Once I finished the whimsical tail, I attached to the horse using my hot glue gun. To see the steps involved in creating the tail head over to the blog post.
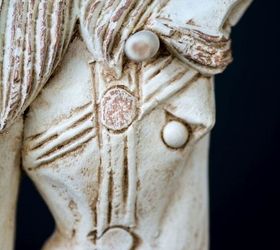
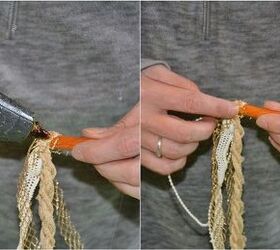 Since the tail had a touch of gold in it, I thought I should do the same for his mane. I grabbed my metallic wax and started highlighting the raised areas of the mane. I also applied some metalic wax in the areas representing metal elements such as the stirrups, bridle buckle and bit ring.
 I am so happy with how it turned out.
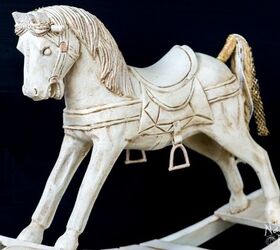
 It looks really whimsical and also a bit romantic!
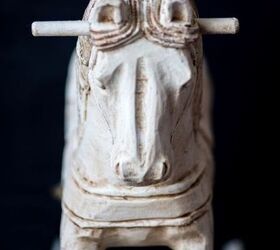
 For more details and pictures of the White Horse please visit our blog.
If you are interested in similar crafts & DiY projects, click here to see more crafts & DiY projects from The Navage Patch.
Thank you for reading!
Handan, xo
Original article and pictures take http://www.hometalk.com/14127470/white-horse site
Комментариев нет:
Отправить комментарий